

1. MicroPython Environment Setup
MicroPython is a lean version of the Python language designed for programming embedded systems and small devices. It brings the ease of use and flexibility of Python to the field of embedded development, allowing developers to use the Python language for hardware control and programming. MicroPython provides the core features of Python and some of its standard library, along with specific libraries and features tailored for embedded systems, such as GPIO control, I2C communication, SPI communication, and more. It can run on a variety of hardware platforms, including microcontrollers, MCUs, and embedded Linux systems. The goal of MicroPython is to provide a simple, easy-to-learn, and efficient way to develop embedded applications. It is suitable not only for professional developers but also for beginners and hobbyists.
1.1 Download the Flasher and Firmware
ESP32 flasher download link: Tools | Espressif
FLASH Flasher Download
Download Center (click to jump)
Under Download Center -> Beginner Guide Materials (Baidu Netdisk) -> Chapter 05 Development Tools -> Firmware Flash Tool
MicroPython firmware download link for ESP32S3: https://micropython.org/download/ESP32_GENERIC_S3/
Download the latest .bin file;
The download speed from the official MicroPython website is slow. We have prepared the firmware in our beginner guide materials so you can download it directly.
MicroPython Firmware Download
Download Center (click to jump)
Under Download Center -> Beginner Guide Materials (Baidu Netdisk) -> Chapter 05 Development Tools -> microPython Firmware
1.2 Flash the Firmware
Open the flash tool; 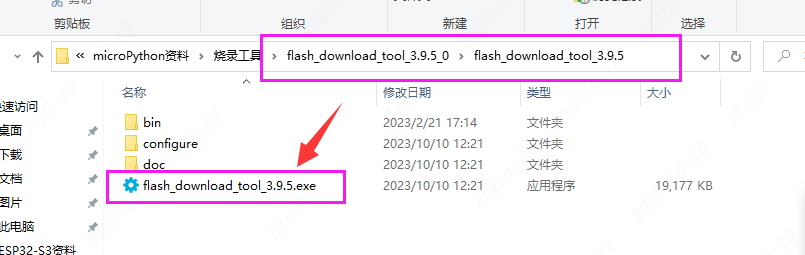
On the initial interface of the flash tool, select ESP32-S3;
Select the firmware path;
Select the firmware flash address;
Connect the dev board to the computer with a USB data cable and select the flash port;
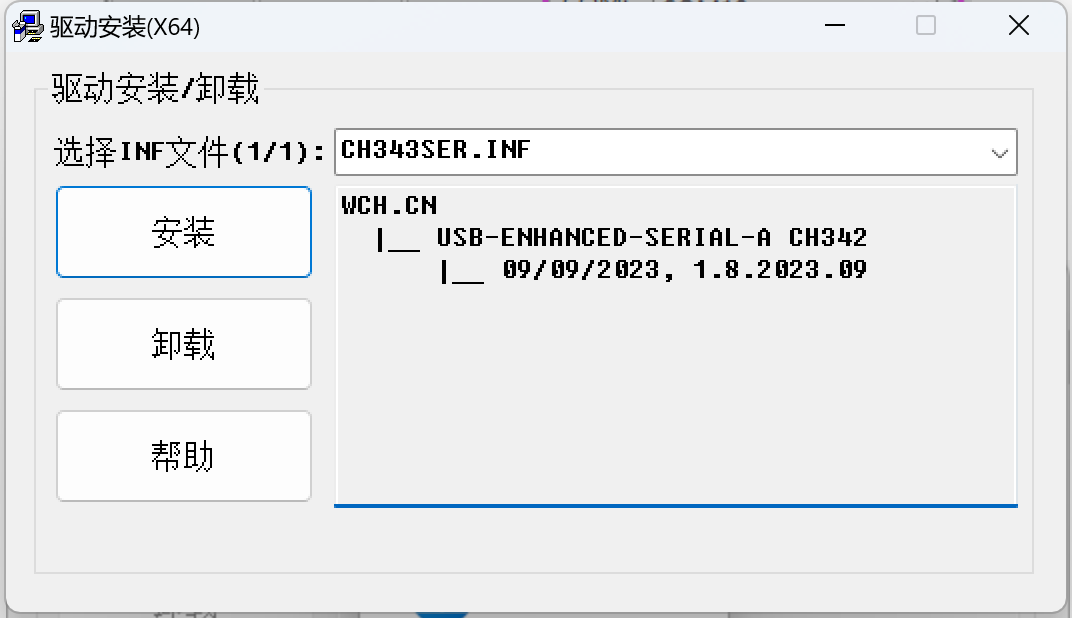
If the port cannot be recognized, the CH340 driver may not be installed.
CH340 Driver Download
Download Center (click to jump)
Under Download Center -> Beginner Guide Materials (Baidu Netdisk) -> Chapter 05 Development Tools -> CH340 Driver.zip
Download the driver above, double-click to run it, click the install button, and wait until "Installation successful" appears.
Flashing complete;
1.3 Install Thonny
Thonny is a simple yet powerful integrated development environment (IDE) designed specifically for beginners and educators. It provides a clean way to write, debug, and execute program code.
With Thonny, you can easily write and run MicroPython code to control the ESP32 dev board. MicroPython is a streamlined Python interpreter specifically intended for programming embedded devices. It offers easy-to-understand and easy-to-write syntax, allowing beginners or non-professional developers to get started quickly.
In Thonny, you can create and edit MicroPython scripts and then upload them to the ESP32 dev board to run. Thonny also provides a set of debugging tools that help locate and fix errors in your code. You can set breakpoints in Thonny, step through code, and monitor variable values to gain a deeper understanding of how the program runs.
In summary, Thonny provides a friendly interface and powerful features that make it easier for you to use the MicroPython programming language to control the ESP32 dev board. Whether you are a beginner or already have some development experience, Thonny is a tool worth trying.
Thonny download link: https://thonny.org/
| Note that you need to move the mouse over the "windows" entry to display the corresponding information. 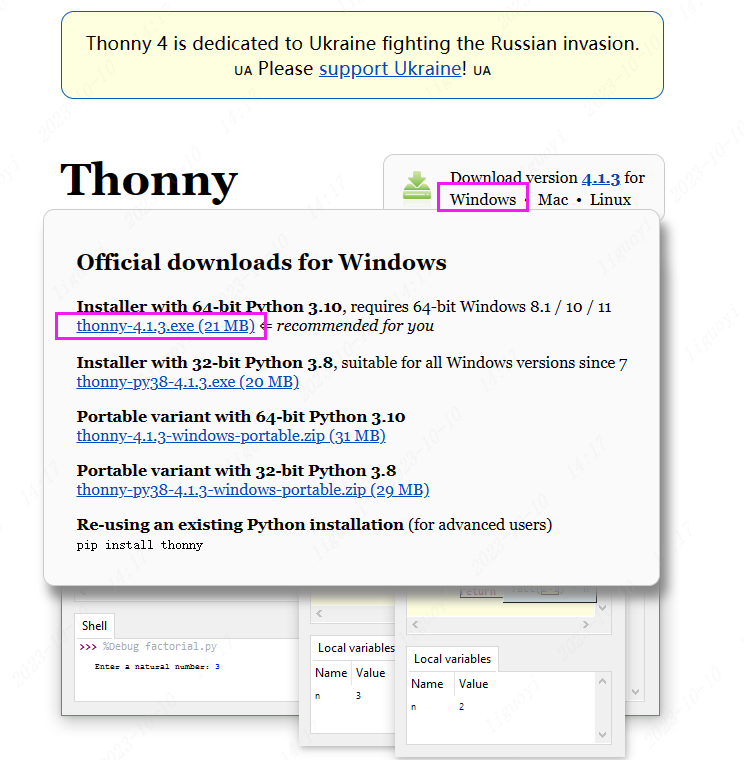
Simply install with the default options all the way through. (It is recommended to change the installation path)
Installation complete;
Set the language; In the main interface, select Options... under Tools;
In the pop-up interface, select the desired language.
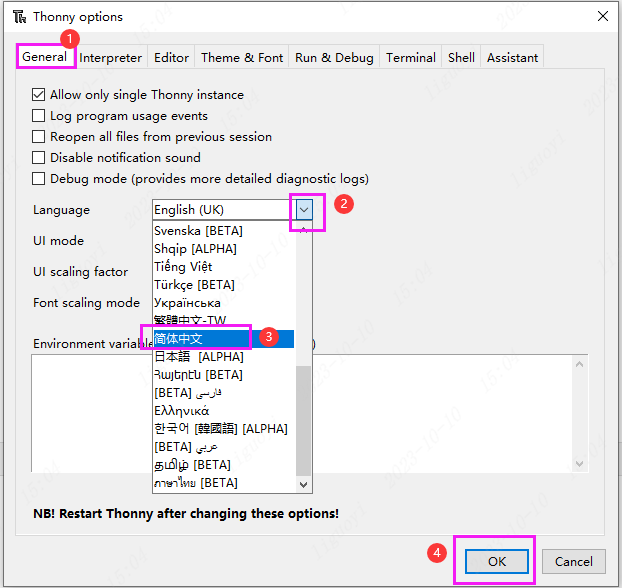
After setting, close Thonny and reopen it to display the new language interface.
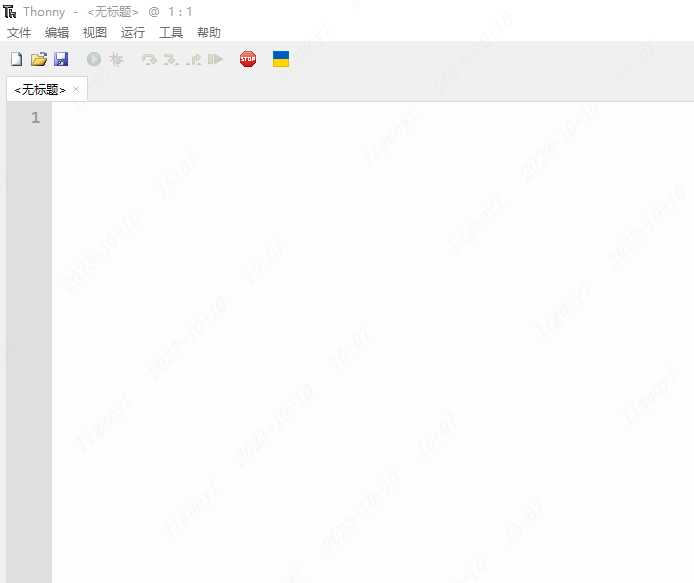
1.4 Connect the Dev Board
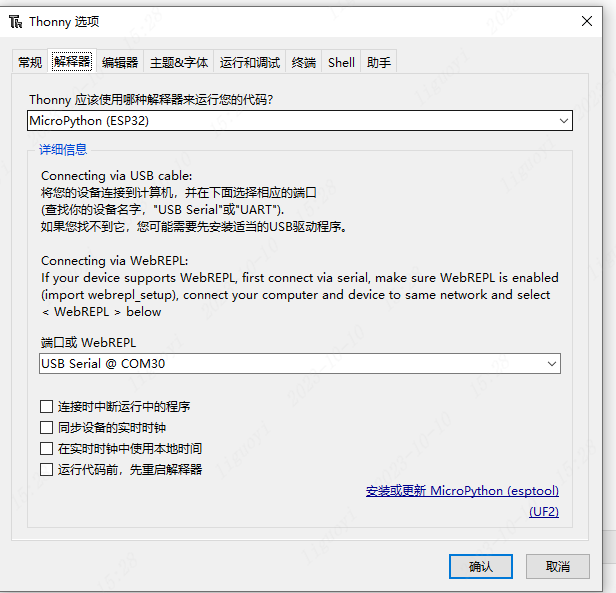
Connect the dev board to the computer via a Type-C cable, open Thonny's Configure interpreter...;
Select ESP32 as the interpreter; 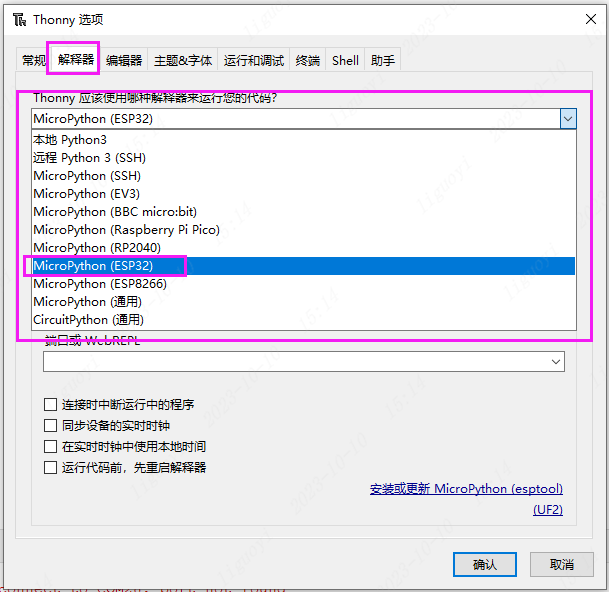
Select the port that the ESP32 dev board is connected to; (the port is different for everyone, please test yourself to find out which port the ESP32 dev board is connected to) 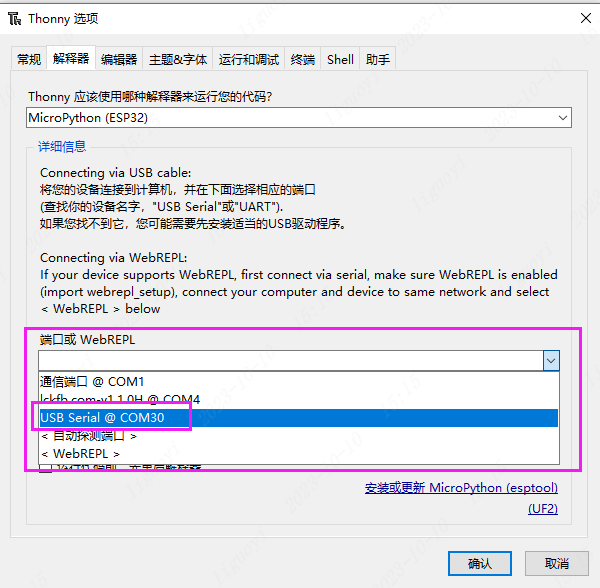
1.5 LED Blink Test
In Thonny, create a new file;
Name it led and save it to any path you like; 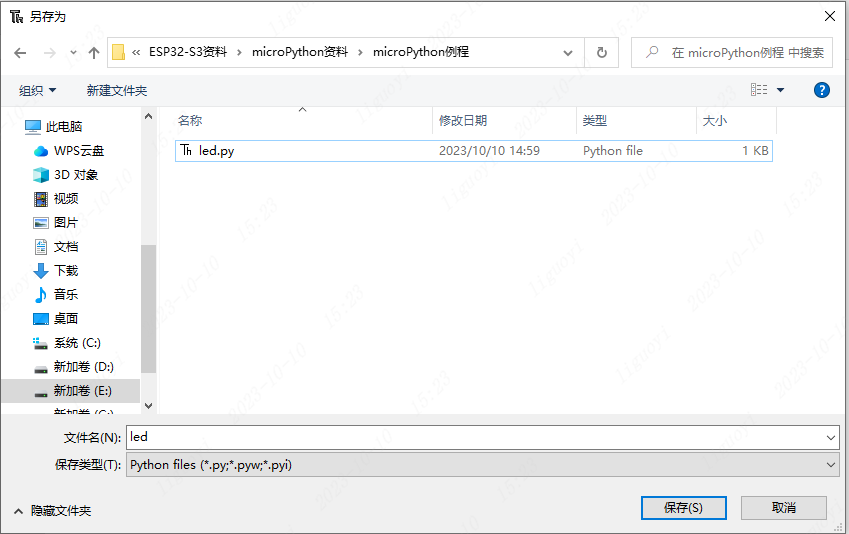
Write the following code in the file: 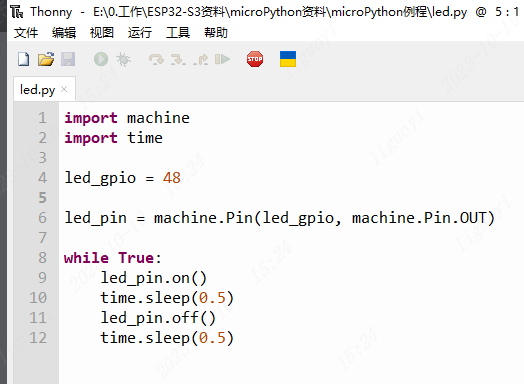
import machine
import time

led_gpio = 48

led_pin = machine.Pin(led_gpio, machine.Pin.OUT)

while True:
    led_pin.on()
    time.sleep(0.5)
    led_pin.off()
time.sleep(0.5)After configuring the interpreter, click the STOP button. When the MicroPython version information appears in the shell below, the dev board is connected successfully.
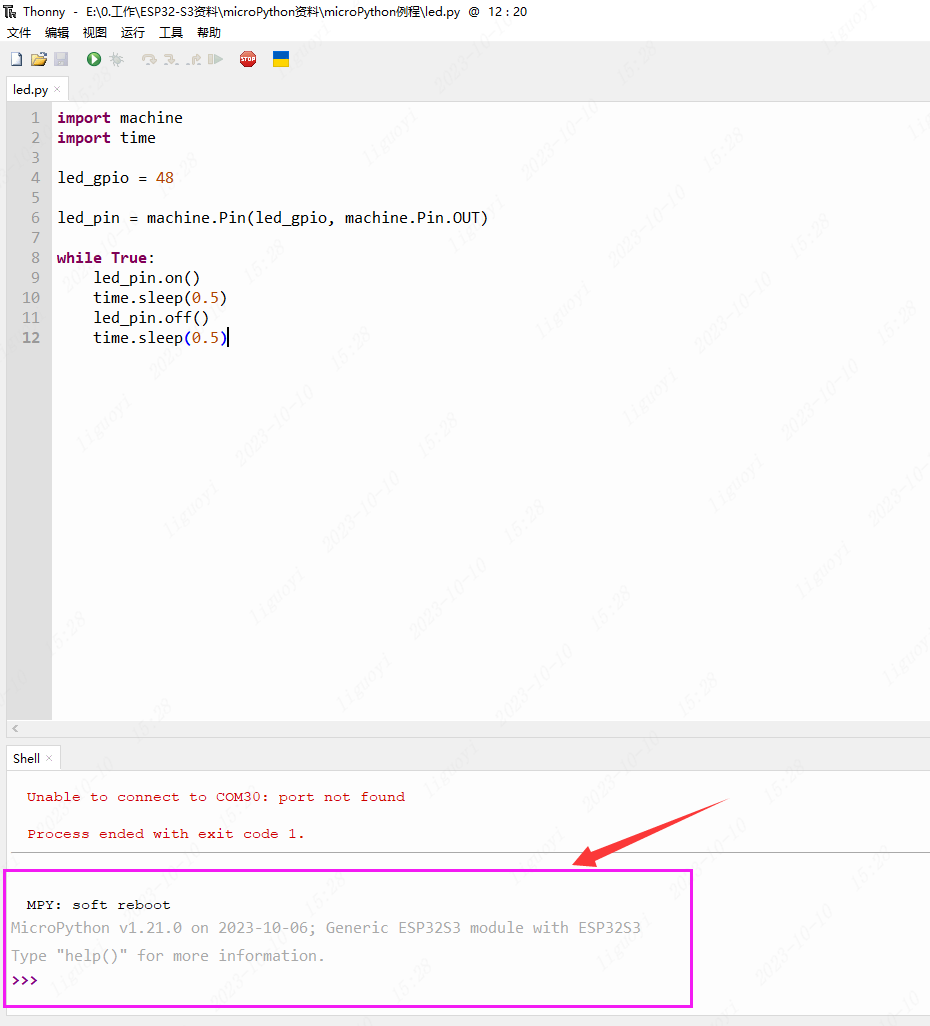
Click the green arrow to start running the current script; 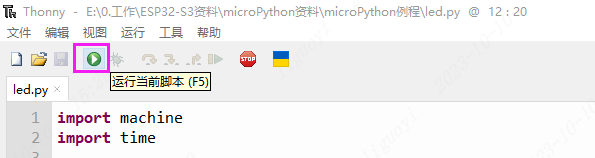
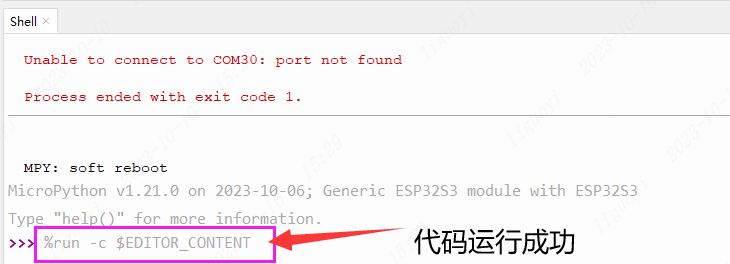
After running successfully, you can see the onboard LED blinking;
1.6 Flash the Code to the Dev Board
Connect the dev board, click the View option in the main interface to enable the file display;
If the dev board is connected successfully, a MicroPython device will appear below, which contains a boot.py file; 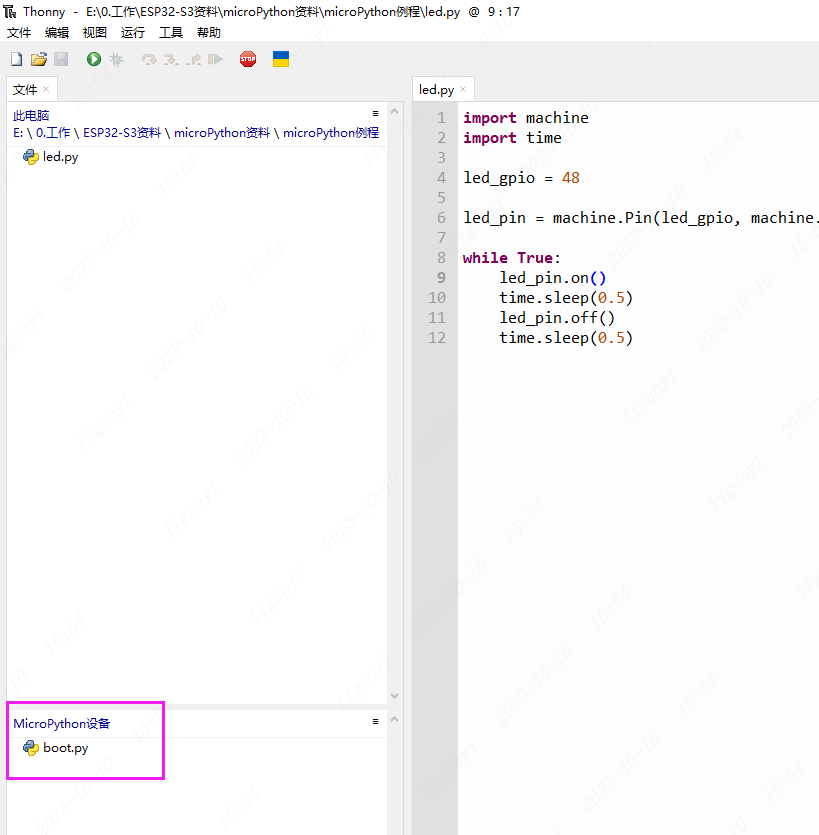 boot.py is the startup code file of our dev board and cannot be deleted, otherwise the program will not run. If we want to add our own running code file, simply name the file main.py and upload it to the MicroPython device.
There are two files that receive special handling when ESP32 boots: boot.py and main.py. The boot.py script is executed first (if it exists). After this file finishes, the main.py script is executed. So if you want your program to keep running after the ESP32 is powered off, name the code main.py and save it in the MicroPython device.