

Description
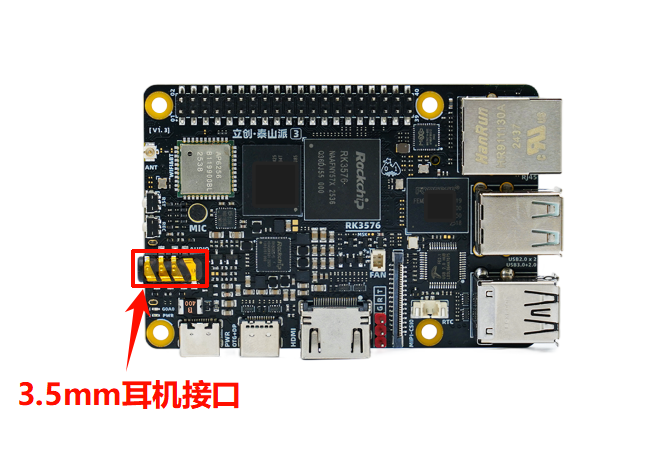
- 3.5mm headphone jack (supports headphones and microphone)
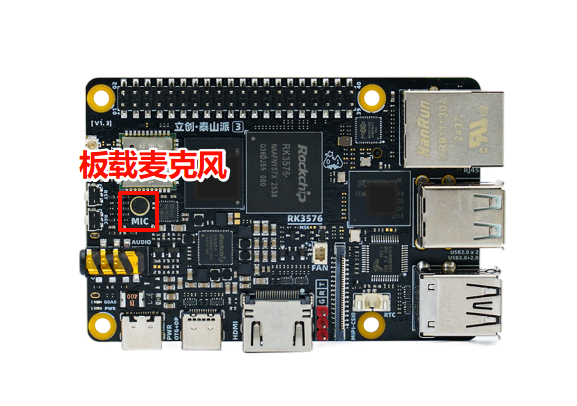
- Onboard microphone
Downloading Corresponding Image
Use Network Disk🚀 to download the provided .img image file in the System Image/Ubuntu24/ directory.
The image used in this document is: TaishanPi-3M-RK3576_Ubuntu24-Xubuntu_AP6256-mSATA.img
Basically all images have audio interfaces enabled by default, so you don't need to specifically download a particular image.
Flashing Image to Development Board
Reference Finished Image Flashing to flash the downloaded image to the development board.
Connecting 3.5mm Headphone Jack
First, insert the 3.5mm headphone into the development board's headphone jack and start recording:
arecord -D hw:0,0 -f cd -r 44100 -c 2 -V stereo headset_stereo.wavStart recording, then speak into the headphone's microphone. After recording is complete, press Ctrl+C to stop recording. To play the recording, use the following command:
aplay -D plughw:0,0 headset_stereo.wavYou can hear what you just said being recorded.
Using Onboard Microphone
First, remove the 3.5mm headphone and start recording:
arecord -D hw:0,0 -f cd -r 44100 -c 2 -V stereo board_stereo.wavSpeak into the onboard microphone on the board. After recording is complete, press Ctrl+C to stop recording. Then insert the 3.5mm headphone again and use the following command to play the recording:
aplay -D plughw:0,0 board_stereo.wavYou can hear the sound recorded through the onboard microphone.